

Hall Effect joysticks are commonly used in various applications, from gaming controllers to industrial machines and robotics. They rely on the Hall Effect, a phenomenon that occurs when a magnetic field interacts with an electrical current, causing a measurable voltage that is then used to determine the position of the joystick. These joysticks are known for their durability and accuracy, making them popular in many industries. However, like any electronic component, they can develop faults over time, affecting performance.
Testing Hall Effect joysticks for faults and performance is essential to ensure they operate correctly and maintain the required precision. In this article, we will guide you through the process of testing Hall Effect joysticks, from identifying common faults to evaluating their overall performance. We will cover everything from basic troubleshooting to advanced diagnostic techniques, helping you identify any issues and ensure your joystick works optimally.
What Is a Hall Effect Joystick?
Before diving into testing procedures, it’s important to understand the working principle behind Hall Effect joysticks. These joysticks typically consist of a magnet and a sensor that detects the position of the magnet. The magnet is attached to the joystick's moving part, and as the joystick is moved, the magnet changes its position relative to the sensor.
The Hall Effect sensor is sensitive to changes in the magnetic field. When the magnet moves, the sensor detects these changes and converts them into electrical signals that correspond to the joystick's position. These signals are then processed and sent to the device or controller to provide feedback on the joystick's position.
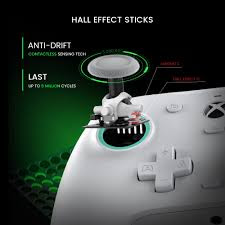
One of the key advantages of Hall Effect joysticks is their contactless design. Since there is no physical contact between the magnet and the sensor, wear and tear are minimized, making them more durable compared to traditional potentiometer-based joysticks.
Why Is Testing Hall Effect Joysticks Important?
Testing Hall Effect joysticks is crucial for a number of reasons:
- Performance: Over time, the magnet or sensor can degrade, leading to inaccurate readings and poor joystick response.
- Durability: Although Hall Effect joysticks are generally more durable than potentiometer-based ones, they can still experience mechanical issues, such as worn-out components or faulty connections.
- Precision: Joystick accuracy is crucial for many applications. A faulty joystick can result in poor control, whether you're playing a game, operating a drone, or controlling a robotic arm.
By regularly testing your Hall Effect joystick, you can catch potential issues early, ensuring your system continues to perform at its best.
Common Faults in Hall Effect Joysticks
Before starting the testing process, it's helpful to know what kind of faults may arise in Hall Effect joysticks. Some of the most common issues include:
- Drifting: The joystick may exhibit a "drifting" behavior where the cursor or character moves on its own without any input. This is often caused by a faulty sensor or magnet misalignment.
- Unresponsive Movement: In some cases, the joystick may fail to register movement in one or more directions, leading to unresponsive controls.
- Inaccurate Positioning: The joystick may fail to provide accurate positional feedback, causing the movement to be jerky or imprecise.
- Dead Zones: A "dead zone" is a region where the joystick doesn't register any input despite being moved. This is typically due to issues with the sensor or calibration errors.
- Intermittent Functionality: Sometimes, a Hall Effect joystick may only work intermittently, either because of faulty wiring, loose connections, or signal interference.
Now that we understand the common faults, let’s explore how to test for these issues.
How to Test Hall Effect Joysticks
Testing Hall Effect joysticks for faults and performance involves a series of steps, from basic visual inspection to advanced electronic measurements. Here's a comprehensive guide on how to conduct these tests:
1. Visual Inspection
The first step in testing a Hall Effect joystick is performing a visual inspection. This can help you identify obvious physical issues, such as damaged components, worn-out parts, or loose connections. Here's what to look for:
- Check for physical damage: Inspect the joystick for any visible cracks, chips, or deformities. Check the housing, switches, and cable for signs of wear.
- Examine the magnet: Ensure that the magnet is securely attached to the joystick’s moving part. If the magnet is loose or out of alignment, it could affect the sensor's ability to detect its position.
- Inspect the wiring and connections: Look for any loose or frayed wires that may cause intermittent connectivity. Pay special attention to the connections between the joystick and the main controller.
- Check for dust or debris: Dust and debris can interfere with the Hall Effect sensor’s ability to accurately detect the magnet’s position. Ensure the joystick is free of dirt.
If you identify any visible issues during the inspection, repairing or replacing the damaged components may resolve the problem.
2. Functional Test (Basic Movement Test)
Once the visual inspection is complete, the next step is to perform a functional test. This involves manually moving the joystick in all directions and checking if the device responds as expected.
- Move the joystick to its full range: Push the joystick to its extremes in all directions (up, down, left, right, and diagonal) to test if the system detects the movement.
- Check for smoothness: The joystick should move smoothly without any stuttering, jerking, or resistance. If the movement feels rough, there may be an issue with the internal components.
- Test for responsiveness: Ensure that every movement of the joystick results in a corresponding response from the device (e.g., a character in a game or a robotic arm). If the joystick fails to respond in certain directions, there may be a fault in the sensor or wiring.
3. Testing with a Multimeter
To perform a more thorough test of the Hall Effect joystick's electrical components, you can use a multimeter. A multimeter can help you measure the resistance, continuity, and voltage at various points in the joystick’s circuitry. This will allow you to detect issues with the Hall Effect sensor, wiring, or other electronic components.
- Measure voltage output: Using the multimeter, measure the voltage coming from the Hall Effect sensor as you move the joystick. The voltage should change smoothly as the joystick is moved, indicating that the sensor is functioning correctly. If you notice abrupt jumps or no change in voltage, the sensor may be faulty.
- Test the wiring: Use the multimeter to check for continuity in the wiring and connections. Ensure that all connections are intact and that there are no open circuits that could cause the joystick to malfunction.
- Check the sensor resistance: Test the resistance across the Hall Effect sensor’s terminals. If the resistance is too high or too low compared to the manufacturer’s specifications, the sensor may be defective.
4. Calibrate the Joystick
If your Hall Effect joystick exhibits dead zones or inaccurate movement, it may need to be recalibrated. Calibration ensures that the joystick registers its full range of motion and provides accurate positional feedback.
- Access the calibration software: Some devices come with calibration software that allows you to adjust the joystick’s settings. If available, use this software to recalibrate the joystick by following the on-screen instructions.
- Manual calibration: For joysticks without calibration software, you may be able to calibrate the joystick manually by adjusting the sensor’s position or the magnet's alignment.
- Test after calibration: After calibration, test the joystick to ensure that it no longer has dead zones and that movement is smooth and accurate.
5. Advanced Diagnostic Tools
For more advanced testing, you can use specialized diagnostic tools to analyze the Hall Effect joystick’s performance. These tools can provide detailed readings and help you identify subtle issues that might not be visible with basic testing methods.
- Oscilloscope: An oscilloscope can be used to observe the waveform of the Hall Effect sensor’s output. By comparing the waveform to the expected signal pattern, you can detect any irregularities in the sensor’s behavior.
- Signal analyzer: A signal analyzer can help you analyze the signals from the joystick in greater detail, allowing you to detect any noise or interference that could affect performance.
6. Testing in a Controlled Environment
To rule out any interference from external factors, it is important to test the Hall Effect joystick in a controlled environment. Avoid testing near strong magnetic fields, which can interfere with the sensor’s readings. Additionally, ensure that the joystick is not subjected to extreme temperatures or humidity, which could affect its performance.
Conclusion
Testing Hall Effect joysticks for faults and performance is crucial to maintaining accurate and reliable control in any application. By performing a series of visual inspections, functional tests, electrical measurements, and calibrations, you can detect and address potential issues before they affect performance. Whether you're a hobbyist, engineer, or technician, understanding how to properly test Hall Effect joysticks will help you ensure their longevity and optimal functionality.

0 Comments